2 Weeks of Intermittent Fasting

Last Sunday I ended my very short experiment on Bulletproof intermittent fasting. I weighed myself and got the numbers: weight = 155.8lb, body fat % = 21.3%. 2 weeks back when I started, I weighed 154.8 and body fat % of 21.5%. No real move at all.
My buddy QuantifiedBob pointed out that I really need 60-70% of my calories need to come from fat. That was not something I was tracking and I don’t think it was reached. I usually eat a ton of protein due to my working out and so this probably derailed the experiment in having a meaningful move in body fat %.
Oh well. It was fun to try. At least I didn’t get hungry during the times I wasn’t eating. Bulletproof Coffee with butter and MCT Oil took care of that. I shifted the fasting time from the suggested 2pm to 8pm to 12noon to 6pm. Eating lunch therefore became easier, but I rushed to finish dinner by 6pm, often ending after that. I don’t think that mattered much as some fasting guides say you can have the eating period be 8 hours long, not 6.
I also may not have done it long enough to see real results. Someday in the future, I’ll have to try this again. Also I want to try protein fasting and see if there are noticeable, positive autopagy results.

Trying Intermittent Fasting

Two days ago I decided to try Bulletproof Intermittent Fasting. I had hosed my back and couldn’t really do any workouts as I recovered so my eating requirements are more flexible – perfect time to try intermittent fasting!
I am trying to eat within 12noon and 6pm only, taking a BP coffee w/ butter and/or MCT oil in the morning and maybe another cup later on if necessary. So far, it’s going easier than I thought. I thought I would get hungry but not even a little bit. I’m still dialing in when to take my handful of vitamins and how much to eat and when, but it’s all kind of interesting.
I weighed myself on my Omron Body Monitor on the second morning and realized I didn’t go to the bathroom, either solid waste nor urinate. So after going, I took my measurements again. It just shows that a simple thing like going to the bathroom or not can affect your numbers.
Before going, my weight was 155.8 lb with body fat of 23.1%. But after going both passing solid waste and urinating, my body weight was 154.8 lb and body fat 21.5%. So I lost 1 lb of body weight plus dropped 1.6% of body fat instantly – whoo hoo! Still, it shows that you have to hold as many variables consistent as possible when you measure or else the results could be off. For kicks I measured myself again and got 155.0 lb and 21.9% body fat. So at least my scale was within some bounds of error and not totally off after consecutive measurements.
Gotta remember to hold the variables constant – probably weigh myself after I go to the bathroom.
More on intermittent fasting in a few weeks!

How to Train for Abdominal Breathing and Generating Intra-Abdominal Pressure

I’ve gone through the importance of abdominal breathing in Optimal Breathing: The Case for Diaphragmatic Breathing. In this post, I’ll talk about how to train for it, and then a basic method for training for using your diaphragm and abdomen breathing to generate intra-abdominal pressure (IAP), the optimal way for stabilizing your torso for movements.
First, how do you know if you are already breathing with your abdomen or not? It’s easy. Right now, without thinking much, take a deep breath, then let it out. How did you take in your breath? Was it via your upper chest, or maybe your shoulders? Or did neither of those move and only your abdomen?
If you didn’t move your chest or shoulders – congratulations you already breathe with your abdomen! Likely, this was not the case. You probably expanded your chest to take air in, or even lifted up on your shoulders to do it.
The real test to know if you are breathing with your abdomen fully is to spontaneously perform this test without thinking and see what happens. A higher level test is to see what happens during a yawn or cough; those are really subconscious actions and if you take in air during either of those two events, you know you have burned in abdominal breathing.
In the following videos, I show some simple exercises that I learned to encourage and imprint abdominal breathing. First, practice the first 3 videos whenever you can during the day, and every day if possible:


These exercises are designed primarily to teach you to turn off use of the chest and clavicular muscles to breathe, while encouraging use of your lower abdomen muscles instead. However, you should know that this is not the endgame. Abdominal breathing is merely the first step.
Proper posture and alignment is critical to gain the full benefits of abdominal breathing. You can breathe with your belly and still have poor alignment. Here is an example – below is a “before” picture of me at a Gokhale Method seminar. I was told to stand up straight. It was right during the time I was working on abdominal breathing:

This was my natural “stand up straight” stance at this time. Notice that my hips are pushed forward into what is called “sway back” or overextended lower back. I also have my chin tilted up, resulting in my neck/cervical spine also being overextended. But also notice the protruding belly as evidence that i was working on belly breathing.
Often, people reject using their belly to breathe because they are afraid of looking like they have a beer belly – a cultural nod to vanity. So they contract their belly muscles to hold it all in. This causes people to use the wrong muscles to brace their torso – they contract muscles that are needed for breathing and realize that when they need to stabilize they have to hold their breath to do so, and then when they let air back out, their stabilization disappears!
It wasn’t until I took Dynamic Neuromuscular Stabilization (DNS) that I could understand what was really going on in the torso during stabilization. Once you learn how to use the diaphragm correctly to create IAP, it turns out that your “beer belly” will disappear.
After the seminar, I looked like this:

Note that good posture is defined as the lining up vertically of your earhole, the center of your shoulder, the center of your elbow, the center of your hips, the center of your knee, and last the ankle bone. I’m much better in the second picture, right? However, I was using Gokhale Method’s cues on activating the “inner corset” – it worked better than what I was doing, but they did not work on abdominal breathing nor IAP generation.
At DNS, I learned this simple technique of taking your abdominal breathing to the next level, which is the use of the diaphragm to create IAP:

Once I learned and imprinted this, I realized that it was an incorrect assumption that abdominal breathing leads always to a beer belly. When breathing this way, it caused activation of my transverse abdominis, this hidden sheet of muscle in the lower torso that is critical to stabilization of the entire body. I could thus remain stable AND breathe at the same time. Amazing! And…my beer belly disappeared because the transverse abdominals were activated all day long, holding my beer belly in check.
When you learn these basics, you have thus laid the foundation for bringing proper breathing methodology and IAP generation to athletics.

Optimal Breathing: The Case for Diaphragmatic Breathing

What is optimal breathing? It is much more than just standing around and sucking air in and pushing it out. In my research regarding breathing, western medicine has little to offer about breathing as a solution to health problems. However, it seems that all the knowledge and research comes out of Europe and through the yogis of India.
Leon Chaitow, an osteopath/naturopath based in London, is one of my favorite authors on the subject of breathing. In his book Recognizing and Treating Breathing Disorders, on Pg 26 is a description of optimal breathing:

Optimal breathing involves:

  • Since the objective of breathing is to meet the metabolic demands of the body, oxygen (O 2 ) and carbon dioxide (CO 2 ) need to be efficiently moved into and out of the lungs ( Abernethy et al 1996 ).
  • During quiet breathing, respiratory efficiency is achieved as the diaphragm descends into the abdominal cavity during inhalation, increasing the vertical dimensions of the thorax as the ribs rise and move laterally, to expand the transverse dimensions of the thorax.
  • The diaphragm relaxing, and returning to its domed position on exhalation follows this sequence, as the abdomen and chest wall return to their starting positions.
  • In good health, meeting the metabolic demands of the body optimally requires a steady, rhythmical pattern with a respiratory rate of 10-14 breaths per minute; involving a ratio of inspiration to expiration of 1 : 1.5-2.
  • Ideally the least amount of mechanical effort from the respiratory musculature should be involved ( Jones et al 2003 ).
  • If such an optimal pattern is disrupted, abnormal and potentially inefficient respiratory mechanics may become the new norm – with the emergence of a breathing pattern disorder.

There are actually four ways to breathe according to the yogis of India. In Light on Pranayama by B. K. S. Iyengar, on pg. 21:

Respiration may be classified into four types:
(a) High or clavicular breathing, where the relevant muscles in the neck mainly activate the top parts of the lungs.
(b) Intercostal or midbreathing, where only the central parts of lungs are activated.
(c) Low or diaphragmatic breathing, where the lower portions of the lungs are activated chiefly, while the top and central portions remain less active.
(d) In total or pranayamic breathing, the entire lungs are used to their fullest capacity.

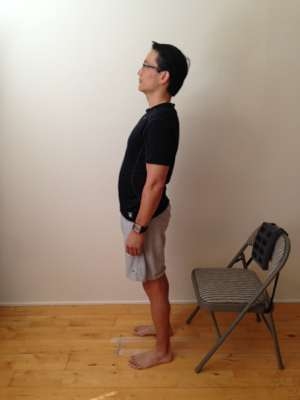
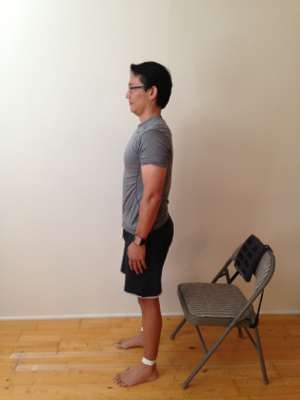
You’d think that we all knew how to breathe correctly since we do it all day long. However, it seems that over time, we have developed a ton of faulty breathing patterns. In Karl Lewit’s Manipulative Therapy, pg. 31:

The most important faulty respiratory stereotype, seen from the point of view of the locomotor system, is that in which the thorax is lifted during inhalation ( Parow 1954 ). In this pattern the thorax is lifted in the cranial direction by the scalene and sternocleidomastoid muscles and the superior fixator muscles of the shoulder girdle, but without expansion of the chest.
Termed ‘clavicular breathing,’ it involves a reversal of the normal respiratory mechanism, since the scalene muscles, which normally only fix the thorax, raise the lung; resistance is offered by the diaphragm. This is inefficient, not only from the respiratory point of view, in that the volume of the chest increases very little, but also for the locomotor system, because of the chronic overload that this causes to the cervical spine.
A further effect is that fixation of the thorax to the pelvis no longer occurs, causing instability of the lumbar spine. The pattern of lifting the thorax during inhalation, or clavicular breathing, can be asymmetric, if one shoulder is raised more than the other. The stress on the cervical spine is then greater on this side. Clavicular breathing is the disturbance that typically occurs when sitting but not maintaining a straight posture, because this makes expansion of the thorax difficult.

and then on pg. 156, what can happen if you exhibit faulty breathing patterns:

Lifting the thorax during inhalation (clavicular breathing)

Tension Superior parts of abdominal muscles, pectoralis, scalene, diaphragm, sternocleidomastoid muscles, short craniocervical extensors, levator scapulae, superior part of trapezius
Painful points of attachment Posterior arch and transverse processes of atlas, spinous process of C2, nuchal line, sternal end of clavicle, superior border of scapula, sternocostal joints and upper ribs
Joint dysfunction (restrictions) Atlanto- occipital and atlanto- axial joints, cervicothoracic junction, upper ribs, thoracic spine

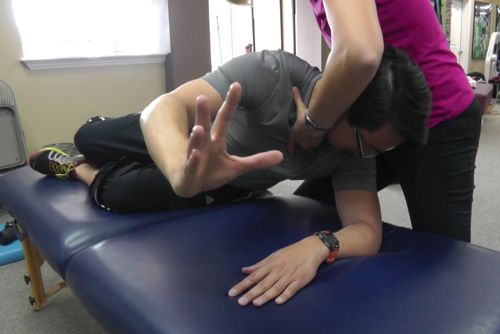
Many things can cause these poor breathing patterns to establish themselves: physical (ie. injury) and emotional (ie. fear, stress) – even intellectual (ie. watching others breathe as models for their own breathing). Over the decades of life, all of these add up to developing poor patterns, certainly poor for performance much less quality of life. So it is important to get back to activating the diaphragm for breathing, where we can get to optimal breathing (as described previously).
Activating the diaphragm has function beyond just that of breathing. For performance, the diaphragm is critical in proper stabilization of the torso. As stated in Manipulative Therapy pg. 30, “The diaphragm is a respiratory muscle with a postural function, and the abdominal muscles are postural muscles with a respiratory function.” Maintaining proper posture and retaining that shape during movement is VERY HARD without the diaphragm helping.
From Recognizing and Treating Breathing Disorders, pg. 17:

A number of studies document coordinated synergy of the diaphragm, transverse abdominis, pelvic floor and the multifidus muscles during postural activity ( Hodges & Gandevia 2000b ). However, this synergy is not under full volitional control and modifiable. Therefore, the diaphragm, controlled by the CNS, assists in ensuring postural body control. The activity of motor neurons of the phrenic nerve is organized in such a way that the diaphragm simultaneously contributes to respiration as well as body stabilization and other nonventilatory behaviours ( Mantilla & Sieck 2008 ).

How does this stabilization work? From Manipulative Therapy pg. 30-31:

The way this is understood today is as follows: the diaphragm attaches dorsally to the spinal column and laterally to the inferior costal arch, while ventrally the fixed point is provided by the abdominal wall. Here, the co- contraction of the deep layer of the abdominal muscles has a key role. Kolar (2006) showed radiographically that the diaphragm was angled downward in the ventral to dorsal direction if the abdominal muscles were weak. If the abdominal muscles are functioning normally, contraction of the diaphragm during inhalation is accompanied by eccentric contraction of the deep abdominal muscles. This can be clearly palpated laterally above the iliac crest. The effect is not only to enable the diaphragm to function in the most efficient way and, as shown by Kapandji (1974) , to expand the thorax, but also to fix the thorax to the pelvis and so stabilize the lumbar spine. The activation of the abdominal muscles during inhalation was also described by Campbell (1978) and Basmajian (1978) .

Beyond the postural and stabilization function of the diaphragm, it also has other important functions relating to digestion (Recognizing and Treating Breathing Disorders, pg. 20):

During a breathing cycle, a rhythmic compression of the abdominal cavity occurs and leads to a cyclical movement of the internal organs. During inspiration, almost all internal organs of the abdominal and retroperitoneal areas shift several centimetres in a caudal direction ( Xi et al 2009 ). This organ movement and the pressure activity of the diaphragm partially contribute to the transport of food and digestive juices. In this way, the diaphragm assists in digestive processes and significantly contributes to peristalsis and food propulsion.

Removing faulty breathing patterns and re-activating diaphragmatic breathing, thus, has many benefits beyond just getting more air into your body.

The New Alleva-Wave (Versus the Old Alleva-Wave and Somapulse): Healing via Pulsed Electro-Magnetic Fields

In my previous post Somapulse/Alleva-Wave: Healing and Recovery via Pulsed Electro-Magnetic Fields, I talked about my success in using Pulsed Electromagnetic Fields (PEMF) to heal a bunch of physical problems like a strained elbow and removing DOMS. It’s pretty awesome technology and I am still amazed the PEMF treatments with either the Somapulse or Alleva-Wave actually works when other things don’t.
Last week I got my hands on the new Alleva-Wave. Here is a pic of it:

Note that this version is half the size of the original Alleva-Wave, which used the same form factor as the Somapulse:

I’m glad they changed the design. I had just damaged the coil jack on one of my old model Alleva-Waves. I think with the plug in the jack so exposed like that, I must have wrenched it in my pocket. Notice on the new Alleva-Wave that there is a collar which supports the plug while in the jack. This should make it much more durable. (In any case, I was able to send my old Alleva-Wave back for repair for $120).
Somapulses come with a case which protects it somewhat. Unfortunately, there is not one included with either Alleva-Wave although this is part of the reason for its lower price. I would recommend one in any case. Visiting the local camera store, I found that the Lowepro Santiago 20 case is awesome for it. The case is stiff so it gives some hard protection for it. There is belt loop so that you can hang it on your belt; much more useful than shoulder strap loops.
It’s got a battery cover now, although with the lithium 9Vs I got off Amazon, they are a VERY snug fit. They fit better now, because I’ve rubbed off a layer of label which made them thicker than the normal 9V battery out there.
Another nice feature is the on/off switch. The Somapulse had an off position, but lost it with the old Alleva-Wave to insert a more powerful X setting which is 35% more powerful than the H position.
Still, all this power isn’t really required – they recommend using lower settings for more effectiveness. I’ve also tested this and found this to be true.
Most recently, I’ve been having problems with my left biceps tendon. I was using the H setting on my Alleva-Wave but it didn’t seem to lessen the soreness any. Two days back I flipped it down to M and then the soreness lessened greatly. Go figure.
They do recommend starting at a lower setting and moving up from there. X has never shown as much improvement as H, and now I’m finding that for my biceps tendon M is setting to use. I guess each of us responds uniquely to the PEMF, and it depends on where on the body we’re talking about. Remember also that the Alleva-Wave is for veterinarian use, and so the higher power setting may be required for large animals in order to penetrate tissues deep enough.
Some other interesting things I’m trying out:
1. Thyroid stimulation – 30 minutes a day, in the morning so that it is optimal for time of day. Stacked coils, level H.
2. Testosterone stimulation – 30 minutes a day, usually in the morning – no particular reason except that I put the coils between in my legs “down there” while I’m driving in the morning. Convenient time to be using it there without others wondering what the hell you’re doing!
All in all, I am still happy to have discovered PEMF for treating these issues. Otherwise, it seems like it takes forever for things to heal now and am very glad that I can cut that time down a considerable amount, and get back to the training I love.

About Nasal Breathing

I’ve finally decided to write about what I’ve learned about proper breathing. Starting here with nasal breathing, I’ve dug into the importance and ramifications of breathing via the nose:
Today I plowed through some books I had on breathing mechanics and have some references. The best book i found so far is “Recognizing and Treating Breathing Disorders” by Leon Chaitow. It is a clinician’s guide, but I read this stuff to gain clues into helping my swimmers. Some quotes and references:
“Finally there is a common association of mouth breathing with chest breathing.” pp. 83
Cites Barelli, Nasapulmonary Physiology, in Behaviorial psychological approaches to breathing disorders. 1994.
This quote basically says that you see mouth breathing as a symptom of chest breathing, which is not a desirable breathing pattern. When you breathe correctly via the diaphragm, you should not need to use your mouth to breathe. But chest breathing results in less air taken in, and therefore you reflexively open your mouth to get more air in.
“Nasal breathing is involuntary. Mouth or voluntary breathing occurs when there is difficulty breathing through the nose, such as in exertion, under stress, and in particular when cardiac, pulmonary, or other illness hampers supply of oxygen to the tissues.”
Again from Barelli above.
These next two quotes are most interesting:
“The nasal route adds at least 50% more resistance to air flow, so one might think that lowered resistance by bypassing the nostrils is a good thing. But pressure rise in the lungs during exhalation makes the air denser, simulating a lower attitude where the air is richer in oxygen per unit volume, and this improves perfusion into the alveoli. Also the increased resistance introduced into the system by nasal inhibition increases the vacuum in the lungs, resulting in a 10-20% increase in oxygen transported.”
“…slowing down the expiratory phase of respiration and ventilation, and the interposing of resistance to both inspiration and expiration which in turn helps to maintain the normal elasticity of the lungs, thus assuring optimal conditions for providing oxygen and good heart function.”
Citing Cottle, The work, ways, positions and patterns of nasal breathing (relevance in heart and lung illness), 1987.
so good things come from nasal breathing both inhalation and exhalation!

Swim Pro at Menlo Swim with Team Sheeper

After months of searching, I finally found a new home with Team Sheeper at Menlo Swim. I now coach Total Immersion swimming as a Swim Pro (click on Meet the Pros) at their Belle Haven pool.
What happened? I was coaching at another pool but apparently the managers there were way too lax and let me coach there against their rules. New management came in and began to enforce the real rules, and I had to leave.
Swim coaching must be one of the hardest to break into – you have a limited set of places to coach in, and they often have swim staff there already whose business they want to protect. I became a coach without a previous swim coaching staff job anywhere and found out firsthand how difficult it is to find a position as a coach.
However, I am very thankful that Tim Sheeper is taking a chance on me and offered me the position. I am looking forward to continuing TI coaching there.
If you want to sign up, go to Menlo Swim’s Mind Body Online page, click on Belle Haven, and look for times there. See you soon!

ARPWave Search and Destroy for Left Shoulder Part II

After I finished Search and Destroy on my left knee, I started working on left shoulder.
My left shoulder has been plagued with soreness in the pec minor area. The pec minor feels always tight and sore, and I can feel it pull my shoulder forward and out of position. This results in compensations in which muscles activate whenever I swim or do pull-ups and I get sore there. In my search for a solution, I decided to turn ARPWave therapy on it to see what would come out.
I setup the machine and started the Search protocol all around my left shoulder. I used an electrode and scanned my left shoulder, my left chest, my left shoulder blade, and also down the left arm. I didn’t find any hotspots except down my arm where I found a problematic medial head of the tricep, and on the bottom edge of the upper forearm.
These two hotspots were pretty “hot” – they caused my ring finger and pinky to contract strongly and convulsely without my control. My hand turned into a claw! There was no way to straighten them out and I could feel the power buzzing all around the electrode in my muscles. In many ways, I was not looking forward to this!
After the Search phase, I put stim pads on my hotspots and prepared for Destroy. The movement was 5 wide grip pull up motions, and then 5 freestyle strokes on each side, and the total time was 7 minutes. I then turned on the ARP Trainer and turned it up as high as I could take it. My left hand immediately turned into a claw and I turned it into a fist to stop it from hurting. Then I did the movements, first pull up movements and then swimming with firsts instead of open hands. It was extremely difficult as the stim power tried to prevent my arms from extending. I did 5 of each, then tried to turn the power higher. The contractions got stronger and my hands were harder to control. I did 5 more of each movement and then turned up the power more, and repeated until 7 minutes were up. By the end of 7 minutes, the power was causing my hands to move of their own volition! It was very disconcerting – my ARP therapist reassured me that no one ever got hurt doing this, even if my hand was moving around like it was possessed and was cracking as it moved!
After turning off the power, my fingers and hand were still buzzing from the strength and high frequency of the electricity. I couldn’t yet move my fingers yet, and they seemed to wiggle on their own.
As soon as they calmed down, I downed 37g of protein (to match the 37g I took before the session) to prevent undue soreness from the treatment.
This continued for 7 sessions at which time I plateaued on power. With these muscles, I was struggling to reach max power which came a lot easier with my bigger leg muscles. Increases came in inches so we decided to move on to the strengthening phase.
For this strengthening phase, I mirrored the pad placements on my left arm on my right arm. I would use a move called the Statue of Liberty. It involves holding a light 1lb dumbbell, and placing it across my waist with thumb turned down, and then raising it across the body while turning my thumb upright to the finish overhead position, as if I were holding the torch like the Statue of Liberty. I would do 1 min with the left hand, then 1 min with the right hand. After this, I would attempt to increase power, and then repeat the Statue of Liberty on both hands. This would go on for 5 intervals for 10 minutes of work, with power increases in between.
The first session was incredibly tough. My left arm was already adapted somewhat to the stim, but my right arm was first encountering it. So while it was relatively easy for my left arm to the do the movement, the right arm was having a ton of trouble as it caught up with the power of the stim. I strengthened for 11 sessions and by the end I reached max power. But it would a tough ride. There were a few times where my right hand was stimmed so hard that I could not even hold onto the dumbbell. I would drop it and then my right hand would turn into an uncontrollable claw! I would then quickly turn off the power and stop for the day.
The test at the end of this therapy was either to swim 10 lengths at 50%, 75% and 100% effort or to do 10 pull ups at 50%, 75%, and 100% load as fast as possible. I did the swim test and there were no issues, only that my endurance was severely lacking and keeping up at the end was tough.
I am unfortunately not optimistic with pull ups. A few tests with a band to assist still left me with a little bit of soreness. So something else must be wrong or missing.
What I learned:
1. A proper mindset is required to able to achieve high power at high frequencies. You must relax and let the energy course through your muscles. To react to it will cause instant seizing up of the muscles for sure, which is not what you want and VERY uncomfortable. It is better to think of it as an irritant and relax into it. That is the first phase.
The second phase is, in order to achieve movement in the presence of the powerful stim, you can’t force the movement. Compensations will occur as will contractions that will resist the movement. Instead, try to send the mental command strongly to move the limb and I think you will find that the limb will move.
2. If you are training with the POV, Search and Destroy can help you adapt faster and reach POV max power. This happened on my VMOs which were, before S&D, very resistant to high power. Now I can turn up the machine to max power on the VMOs every time.
In seeing the differences between S&D and POV training, I spent a focused time with the ARP Trainer on one thing. I find that my POV programs don’t allow me to spend enough time often enough to get to adaptation faster. I am wondering what would happen if I took each of my protocols and just did them nearly every day – wouldn’t I adapt faster and get to max power quicker?
3. I think that the therapy, while it does create benefits, is not a total cure just because you did it. You still have to pay attention to proper positioning and imprint proper movement. If you fall back into poor movement patterns, the problems will come back. In the case of my shoulder, I was still feeling soreness if I did particular movements. On the other hand, I do not think we properly duplicated the stress and movement pattern of the pullup to really have addressed the pullup issue. Doing air pull ups really didn’t have the same effect on muscles and the CNS as hanging from a bar and pulling upward.
I am working on imprinting the proper movement patterns so that the soreness won’t come back. However, in working on the tricep and forearm, now they are turning on whereas before they were not functioning correctly.
4. Again, I think that if you do ARP therapy, you should live with a machine for an extended period of time. Going once or twice isn’t a guarantee of a longer cure for problems. Make sure that the movement patterns you use during treatment closely mimic the movement pattern(s) that give you problems. Use perfect movement when you do the movements. Execute them flawlessly. This may require a good coach or movement specialist to watch you VERY carefully and correct you.

Dynamic Neuromuscular Stabilization: Awesome!

This last weekend I spent 4 days learning the basics of Dynamic Neuromuscular Stabilization, or DNS. It was a fantastic 4 days and not only did I learn the basic techniques, but also got to see a group of experienced PTs in action using methods I had not seen before, and giving out information in ways I had not heard before.
DNS was developed at the Prague School for Rehabilitation by Professor Pavel Kolar through watching how newborns develop their stabilization and movement skills, from lying down to finally figuring out how to stand up. The techniques are based on the stages the child goes through and they are named as such like 3 months, 4.5 months, etc. They have shown that most people, if they have gone through proper development when they were babies, still have this basic movement capability burned into their nervous systems. It’s just that over the years after childhood, we have either forgotten or muddied up those beautiful movement patterns from our childhood. The techniques enable us to bring back those good movement patterns and help re-burn them into our current nervous system. Watch the videos on the Prague School site for more detailed information.
There are many classes to take. I took DNS Exercise Level 1 and 2, which is more for fitness professionals. Clinicians take another set of DNS classes. We went through a whole set of assessment positions, which can be also used for treatment as well.
Some of the really interesting things I learned:
1. There was the best discussion I’ve heard yet about Intra-Abdominal Pressure (IAP), how to test for it and then how to generate it. Then everything follows from there. Their view is that without IAP, then everything else cannot happen: movement, lifting, walking, etc.
In the fitness world today, we hear a lot about “bracing” before doing a lift. After learning about IAP, I think we need to change the word “bracing” because I think it evokes too much of the wrong thing, which is activating core muscles that can stabilize the torso, BUT you can’t breathe because you’ve squeezed the wrong ones. If you stabilize correctly with IAP, you will also be able to breathe.
2. In order for healthy movement to exist, there must be proper co-activation of opposing muscle groups. In any movement, there are agonists, or muscles that are providing the major force to create movement, and there are antagonists, which are muscles that oppose the agonist.
As an example, in the case of a bicep curl, the agonist is the bicep which concentrically contracts (shortens as it contracts) to flex the lower arm up to the upper arm. The antagonist is the tricep, which must eccentrically contract (lengthens as it contracts), to let the bicep move the lower arm up to the upper arm. If either one doesn’t do whatever supposed to do in perfect timing, then problems can occur like compensatory actions (using other muscles that shouldn’t normally be used) and can lead to injury. Imagine if your hamstrings are very tight, and then you swing your straight leg forward up – the hip flexors raise the leg up but if the hamstrings are so tight and can’t eccentrically contract fast enough, you could pull them as you whip your leg up. So proper function is that over your entire body, your muscles are co-activating as agonists and antagonists in balanced way with proper timing, and can both concentrically and eccentrically contract at will.
DNS contains techniques to help fix issues in co-activation. Here is a shot of one of their PTs working on my left shoulder, which I’ve been trying to fix for a while now.

My left shoulder has a tendency to drift forward and my pec/pec minor feels always tight. It gets sore when I swim, and sometimes really acts up during pull ups. In the pic, she is using one of the DNS positions and encouraging the eccentric contraction of my external rotators, while setting my shoulder in the correct position.
The moment I got out of that position, my shoulder felt great! Wow!
3. The spine must be properly aligned, from pelvis to the top of the head. The moment you break from proper alignment, compensations start popping up and inefficient movement occurs. All of the DNS moves involve setting the spine in as perfect alignment as possible, and then a movement is performed where we encourage the person to not break from spinal alignment, and to learn how to maintain spinal alignment in non-static situations.
4. Joints must be centrated in order to perform proper movement, support maximal loads, and protects structures. Decentrated joints cause problems! So the upper arm must be in the proper location in the socket to move efficiently and safely, as does the head of the upper leg bone must be in the proper place in the hip socket.
We went over how to centrate joints properly and how to observe the body for signs that joints are not centrated.
It was amusing to see how these PTs would get right up on you, using their whole body to hold you in place as you performed movements, holding your spine in position and your joints in centration! But it was necessary – it’s the only way the person can feel the proper position of the body as you go through the movements. The PT would first align and centrate you in static position, then hold you in position with their entire body and lead you through movement to the end position of a DNS developmental position.
After taking the class, my mind was filled with new ideas and possibilities. I contacted another DNS certified trainer to run me personally through all the DNS positions, checking me and making sure I am holding proper position in each one. I figure if I am to use DNS on someone, I may have to demonstrate and if so, it better be as close to perfect as I can get it!
I am also looking forward to applying DNS IAP development on some of my swimmers. Without IAP, it is impossible to efficiently transfer energy from the kick through to the spear of a stroke; you have energy leakage all along the way. But with IAP, you will be able to have a great base to transfer energy as well as make great swimming movements in the water.

MobilityWOD Quick Start Guide

I discovered MobilityWOD (MWOD) last year and love the content they put up. It has really opened my eyes on my own problems and limitations, for which I never really had good solutions for – but now I do. My education on anatomy and proper movement and mobility has gone way up as a result of their presentation of the material – previously it seemed like you had to be some health professional to understand what was going on. All these big words and concepts – nothing ever stuck until now.
Becoming a Supple Leopard by Kelly Starrett of MWOD is an amazing book. His site is an extension of the book, kept up to date in real time with developments from him and his staff. While the content came out of Crossfit circles, it is relevant to any athletic activity.
In the forums, I posted this entry on how to start with MWOD. Despite the approachable nature of the material (formerly unapproachable in big medical and scientific terms), it is still a lot to take in. So here is my short cut (with minor edits from the forum post) to getting started with MWOD and how to diagnose and fix your particular problems:
I can feel for you. When I started going through the material, it was daunting. In fact, it still is as more gets added each day. And then, as my PT likes to tell me, year over year the philosophies can change (like Kstarr’s stance on icing, where it’s promoted in his early videos and not in his later ones). But yet those videos are still up! Dang it!
Here’s my suggestion for a template on shortening the process:
1. Get Becoming A Supple Leopard (BSL). Watch some of the early MWOD videos, Episode 1 and 2.
2. I would definitely spring for at least a month of PRO access to watch the webinars. They also give you a sense for the problem areas on most athletes. Once your understanding increases, your ability to address problems increase.
I would also highly recommend subscribing monthly to PRO. The videos there are updated daily in DailyRx, and there is always something new I learn, some little detail I missed the last time through.
3. I would then go into BSL and read the early chapters 1,2,3,4. Pay attention to the various tests there, like deep squat and evaluating external and internal rotation at the shoulders and hips. Try some of those. Are there any that you cannot do? If so, then work on that. That can give you a start on identifying which areas can be improved, even if you have no visible problems now.
4. Get a lacrosse ball, Battlestar Big and Little, Supernova, Gemini, Voodoo bands, Rogue Fitness bands green and black, Yoga Tune Up Alpha Ball and Therapy Balls (Yes this can set you back a lot of cash but it IS WORTH IT). Use these in your mobs (short for mobilizations) to work on those areas you want to improve.
Select a test like a deep squat that you want to improve. Use mobs for the relevant areas. After each mob, get up and test the squat again. If improved, remember this mob for future work. Keep going to next mob. stop, get up and test again, etc. etc. It can take days/weeks to achieve the full ROM in a given test or it might take an hour.
5. You can also use mobs to see if you need to work on an area. I often go down into banded distraction hip openers, only to find that I don’t have any significant corners to release. So i don’t hold those for 2 minutes but quickly move to the next mob.
6. Are you into a certain sport? There are videos that pertain to certain sports. that can also speed up the process by getting you to focus on a given area(s).
Yes there is a lot. i would slowly work into it. it’s all very interesting when you start digging in. and yes it is kinda overwhelming in the beginning.
If you live near a good MWOD trained PT or movement specialist, they can show you what a process looks like live. I did some sessions with Roop Sihota and it was awesome watching how he evaluates and goes through the process. I also video the session so i can go back and review later.

I loved the MWOD process so much that I went (and suffered through) a Crossfit Level 1 Trainer course, and am heading for the Movement and Mobility Prep Course, taught by MWOD staff.